Add Row
Add Element
UPDATE
Add Element
  • Home
  • Categories
    • HVAC
    • Home Maintenance
    • Plumbing
    • Electrical
    • Roofing & Exterior
    • Smart Home
    • Energy Savings
    • Spotlight Interviews
    • Guides & Tutorials
    • HVAC Expert Insights
Spotlighting the leaders shaping the future of home and industry.
November 22.2025
4 Minutes Read

DIY Water Heater Repairs: When You Can or Should Call an Expert

HVAC contractor performing water heater maintenance for plumbing safety tips.


DIY or Hire a Pro? Making the Right Choice for Your Water Heater Repairs

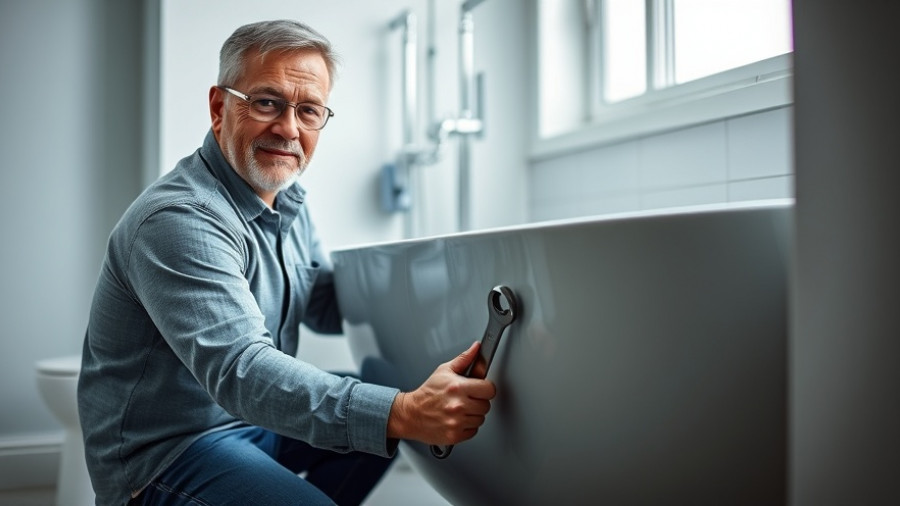
If your water heater is on the fritz, you may find yourself at a crossroads: should you attempt a DIY fix or call in the professionals? Whether you’re trying to save money or take pride in your handiwork, navigating the complexities of water heater repair requires careful consideration. Hot water, electricity, and gas lines can combine to create a hazardous situation if not handled properly. Understanding when to roll up your sleeves and when to pick up the phone can be the difference between a small repair and a costly disaster.

When is DIY an Option?

Many common water heater issues can be addressed by resourceful homeowners. A few straightforward scenarios allow for DIY interventions, such as:

  • Relighting the Pilot Light: A common issue with gas water heaters, relighting the pilot light can often restore functionality if followed step-by-step according to manufacturer instructions. However, if the light won’t stay lit, it’s a sign that a deeper problem, such as a faulty thermocouple, requires professional attention.

  • Flushing the Tank: Sediment buildup can compromise the efficiency and lifespan of your unit. Flushing your water heater on a regular basis can ensure optimal performance, although this task requires care to avoid damaging the tank.

  • Adjusting the Thermostat: Ensuring the thermostat is set properly is essential for both comfort and safety. A simple adjustment can often fix issues of insufficient hot water.

These tasks represent the types of maintenance homeowners can do themselves as long as they take necessary safety precautions.

Red Flags: When to Call a Professional

On the other hand, specific scenarios should definitely prompt a call to a professional plumber:

  • Leaking Water: A leak could indicate significant issues with the tank or components, posing severe risks of water damage or mold growth. If you see water pooling, don’t attempt to seal it yourself—call a pro instead.

  • Tripped Circuit Breakers: Consistent breaker trips with your electric water heater point to underlying electrical issues that can escalate into fires if not promptly addressed by experts.

  • Gas Smells or Carbon Monoxide Concerns: If you detect a gas odor, shut off the gas supply, evacuate your home, and seek immediate professional help. This is not a situation for DIY repairs.

Each of these scenarios carries potential risks – not only to the functionality of your water heater but also to your safety and the safety of your household.

The Fine Line: Navigating Risks

When weighing your options, consider the risks involved with any DIY repairs, particularly for a job that involves gas and electricity. Professional plumbers are trained to connect diagnostic information with suitable repairs, and they carry the tools and safety protocols necessary to mitigate risks associated with water heaters.

A recent article from Ken’s Plumbing emphasizes that replacing a water heater is a complex task that comes with numerous safety concerns. They highlight that professional plumbers ensure compliance with stringent codes, handle specialized equipment correctly, and most importantly, protect you with their training and insurance. The right choice can save you from costly damages and illness.

The Value of Professional Services

Hiring a licensed plumber offers advantages that DIY efforts simply can’t match:

  • Business Insurance: Licensed plumbers are insured, which covers you against potential liabilities from mishaps that may arise during repair work.

  • Timeliness: Professionals can execute repairs more quickly, returning your home to normal without the stress of potential mistakes dragging out the process.

  • Long-Term Cost Savings: While professional help may cost more upfront, getting it right the first time helps avoid repeat repairs and emergency costs down the line.

Knowing when to DIY and when to call in the professionals can not only enhance safety but also extend the lifespan of your water heater. Keep an eye on performance issues and be proactive about repairs to save yourself money and hassle in the long term.

Conclusion: Make an Informed Decision

At the end of the day, a water heater is a vital component of your home. Attempting to do it yourself can sometimes lead to more significant headaches down the road. Exercise caution in your approach—whether that means seeking help for more intricate repairs or rolling up your sleeves for a simple fix.

For safety and efficiency, consider reaching out to reputable professionals who can help you navigate the sometimes murky waters of water heater repairs. Take the steps to ensure your home remains safe and functional—never hesitate to check in with a plumbing expert when in doubt.


Plumbing

Write A Comment

*
*
Related Posts All Posts
12.10.2025

How to Fix Your Shower Diverter Like a Pro: An Essential Guide

Update Understanding the Importance of Shower DivertersThe shower diverter plays a crucial role in ensuring efficient flow management within your bathroom fixtures. By redirecting water between the bathtub faucet and the showerhead, it creates a seamless transition that enhances your showering experience. However, a malfunctioning diverter can disrupt this flow, leading to undesirable outcomes such as leaks or even higher water bills. Homeowners often overlook the diverter until issues arise. Understanding its function and maintaining it can save considerable hassle and expense in the long run.Spotting Your Diverter's TroublesIdentifying a faulty shower diverter is straightforward. If water continues to pour from both the tub faucet and showerhead after engaging the diverter, it is likely that your diverter needs attention. The problem often stems from worn-down components, particularly the rubber components inside the diverter that fail to create a proper seal. These signs may be subtle, but catching them early allows for manageable repairs rather than extensive overhauls.What Are the Different Types of Diverters?Before diving into repairs, it's essential to understand the different types of diverters. There are three main types:3-Valve Diverter: Found in shower setups with two separate faucet handles, it allows users to control water flow efficiently.2-Valve Diverter: Typically integrated into single dial setups, this type is designed for straightforward temperature adjustment.Tee Diverter: The most common among households, it utilizes a pull-up mechanism to switch flow from the faucet to the shower.Recognizing which type you have is vital for effective troubleshooting.Gathering Your Tools for RepairBefore embarking on your repair journey, ensure you have all necessary materials at hand:VinegarPlastic bagRubber bandCooking sprayPliersScrewdriverThese everyday items will allow you to tackle the most common issues without needing to call a plumber right away.Effective Steps to Fix a Shower DiverterHere’s a methodical approach to repairing your shower diverter, which can be broken down into simple steps:1. Clean the SpoutA dirty spout can hinder the operation of the diverter. Use a mixture of vinegar and water as a natural cleaning solution. Submerge the shower spout in this solution using a plastic bag secured with a rubber band for a few days. Vinegar effectively breaks down limescale and grease build-up, promoting smooth operation once cleaned.2. Lubricate With Cooking SprayIf the diverter is still sticking after cleaning, a little lubrication might be necessary. Cooking spray works effectively, unlike some harsher alternatives that may corrode components. Apply the spray to the diverter knob and spout, then check for improved movement by manipulating the diverter up and down. This simple trick can often rectify stubborn performance issues.3. Check the Diverter AgainOnce the cleaning and lubrication processes have been completed, test the diverter. If it still does not function correctly, further action may be necessary. Replacement might be required if issues persist.When to Call a ProfessionalWhile DIY repairs can solve many minor issues, don't hesitate to call a professional plumber for complex problems. If your diverter requires replacement, or if there are unresolved leak issues, seeking expert help ensures safety and effectiveness. This is especially crucial if your plumbing is older or has not been serviced in years, as systemic problems might be lurking just below the surface.The Bottom Line: Take ActionRegular maintenance of your shower diverter is vital in preventing larger issues down the line. Understanding how to identify problems, gathering the right tools, and following effective repair strategies can empower homeowners. Take action now to avoid future inconveniences. Whether you choose to handle repairs yourself or bring in a professional, being proactive ultimately keeps your bathroom functional and efficient.

12.09.2025

Discover How to Unclog a Bathtub Drain Without Chemicals: 4 Easy Solutions

Update Effective Methods to Unclog Your Bathtub Drain Without Chemicals A clogged bathtub is more than just an inconvenience; it can disrupt daily routines and cause stress for homeowners. Thankfully, understanding how to unclog a bathtub drain without resorting to harsh chemicals can save you time and money. The key lies in utilizing some simple techniques and tools that can effectively tackle common culprits like hair, soap scum, and debris. Identify the Culprits: What Causes Bathtub Clogs? Before we delve into solutions, it's essential to recognize what leads to drain clogs. Generally, the most common offenders include: Hair Buildup: Long strands can accumulate over time, causing a blockage. Soap Scum: The residue from soap mixes with water to form a sticky buildup. Dirt and Debris: Dust, soil, and other particles find their way into drains. Small Objects: Items like jewelry or bottle caps can inadvertently drop into the drain. By understanding these causes, you can effectively implement cleaning methods tailored to eliminate these specific blockages. Introduce Simple Solutions: Four DIY Techniques With the causes identified, here are four doable methods to unclog your bathtub without relying on toxic chemicals. 1. Boiling Water Flush One of the simplest yet highly effective methods is using boiling water. Heat a pot of water to its boiling point and carefully pour it down the drain. This method helps break down soap scum and grease buildup. If you find your water is draining slowly, performing this action can significantly enhance the flow. 2. Baking Soda and Vinegar Reaction This classic combination works wonders in unclogging drains. Pour a cup of baking soda into the drain, followed by a cup of vinegar. Let the mixture fizz and work its magic for about 30 minutes, then flush it through with hot water. The chemical reaction helps dislodge stubborn clogs, and is much safer for your plumbing system than commercial drain cleaners. 3. Manual Removal of Debris Sometimes, the easiest method involves simply getting your hands dirty. Start by removing the bathtub stopper to access the drain directly. Use a flashlight to inspect for visible debris and gently remove accumulated hair and other materials with gloved hands. This hands-on method can often address severe clogs right at the source. 4. Use a Plunger If the clog persists, a plunger can provide the necessary force to dislodge stubborn blockages. Make sure there is enough water in the tub to cover the plunger's cup, and perform quick downward thrusts for about 20 seconds. The suction created helps break up compacted clogs, allowing water to flow freely. When to Call in the Professionals While many clogs can be managed with DIY techniques, there are instances that may require expertise: Repeated clogs despite multiple attempts at DIY solutions. Persistent odors that return even after cleaning. Gurgling sounds emerging from your drain. If encountering these signs, it may be time to consult with a professional plumber who can utilize specialized tools and expertise to resolve more extensive plumbing issues. FAQ: Quick Answers to Common Questions How Do You Unclog a Bathtub Drain Fast? The quickest method is to pour boiling water down the drain. However, adding a mixture of baking soda and vinegar can speed up the unclogging process and is a safe alternative. What Can Dissolve Hair in the Drain? A mixture of vinegar and baking soda is effective in breaking down hair clogs. This environmentally friendly option safely dissolves hair without damaging pipes. Conclusion: Take Back Control of Your Bathroom Having a clogged bathtub drain doesn't have to lead to frustration. By implementing these straightforward and chemical-free methods, you can effectively manage clogs and restore the flow of your plumbing. For persistent issues, remember that you have the option to call in a professional. Keeping a proactive approach to regular maintenance can prevent future clogs and ensure your bathroom remains a sanctuary of relaxation and comfort.

11.23.2025

What Every Homeowner Should Know About Water and Sewer Lines

Explore the water and sewer lines difference, common issues, and essential maintenance tips for homeowners.

Terms of Service

Privacy Policy

Core Modal Title

Sorry, no results found

You Might Find These Articles Interesting

T
Please Check Your Email
We Will Be Following Up Shortly
*
*
*